Quick Start
Integrate the core actor or open the example project.
Core asset integration
Add a spline slide to a level using your existing Character, GameMode and input setup.
In the supplied project, right-click SimpleSlideSystem/Core/BP_SimpleSlideSystem and choose Asset Actions › Migrate. Keep the dependencies selected, including the enum, icon and audio, and point Unreal at the destination project's Content directory. Keep your existing GameMode and input mappings. The rider must be a possessed Character with a CharacterMovementComponent and player controller.
-
Add BP_SimpleSlideSystem to a level
In the Content Browser, open
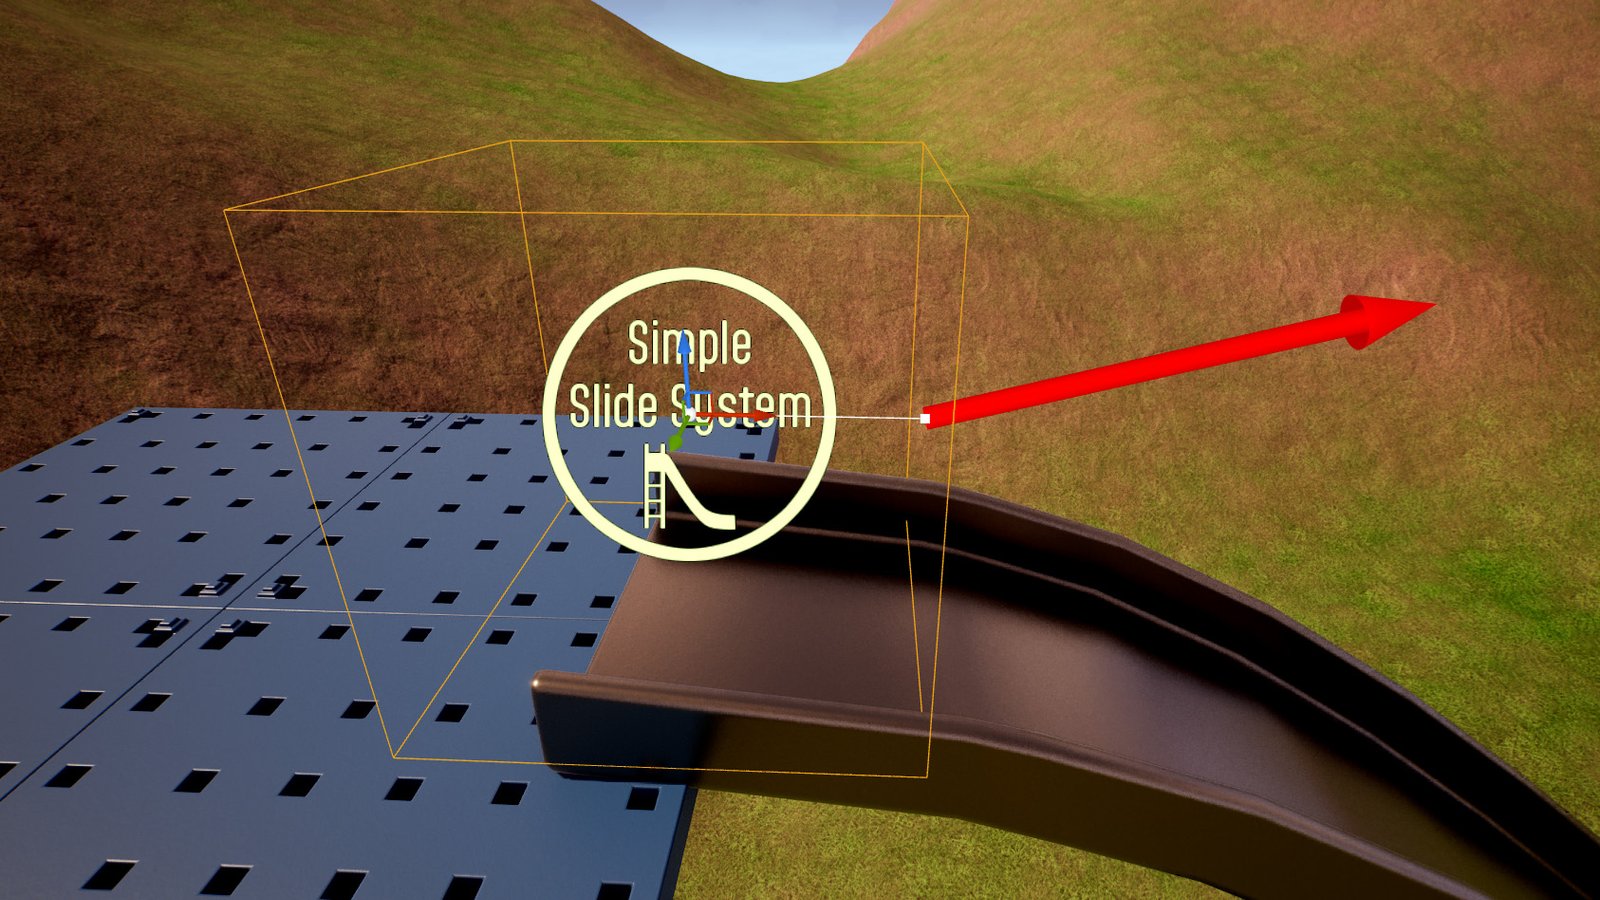
SimpleSlideSystem/Coreand drag BP_SimpleSlideSystem into your level.You'll see three things in the viewport:
- A spline — the path the rider follows.
- A box at the start of the spline — the Entry Trigger. Walking into it starts the ride.
- An arrow at the end — the Exit Arrow, showing which way the rider will be launched.
 Tip
Place the actor so the start of the spline is somewhere your character can walk to easily, such as the top of a platform or set of stairs.
-
Shape the spline
Select the slide, then click a spline point in the viewport to select it. Move it with the normal transform gizmo.
- The first point is the top of the slide (where the ride starts).
- The last point is the exit (where the rider is launched).
- To add a point, hold Alt and drag an existing point, or right-click the spline and choose Add Spline Point Here.
For a first test, simply drag the last point downhill and out to the side so the slide has a clear slope.
NoteThe Entry Trigger always snaps to the first spline point. To move the entrance, move the first spline point, not the trigger box.
Red text above the slide?If you see "SETUP ERROR: The slide spline needs at least 2 points and must be longer than 1 cm.", add a second point or pull the points further apart. A separate warning may appear if the exit looks blocked — see Troubleshooting.
-
Place a Character
Use a player-possessed Character with its normal movement and input setup.
- Using your own project's character? Make sure your Game Mode spawns it, and drop a Player Start near the Entry Trigger.
- Want a ready-to-play example? Follow the demo setup.
WarningUnreal's built-in default pawn (the floating "spectator" ball you get in a blank level) is not a Character, so it can't ride the slide. If nothing happens when you walk into the trigger, this is the most likely reason.
-
Press Play
Click Play (or press Alt+P) to start Play In Editor.
-
Ride the slide
Walk into the Entry Trigger. Your character will:
- Glide smoothly onto the top of the slide.
- Turn to face down the slide and pick up speed on the slope.
- Launch off the end in the direction of the Exit Arrow.
- Land with full control restored.
After a short cooldown (1 second by default), the slide is ready for the next ride.
If you slid but the view didn't turn to face down the slide, your character's camera needs Use Pawn Control Rotation enabled. See Camera requirements.
Next steps
Your slide works. Now make it feel right:
- Add a mesh. The slide actor is invisible in game — place one of the example meshes from
Demo/DemoContent/Meshes(or your own) and shape the spline to follow its surface. See Using your own slide mesh. - Rider sinking into the mesh? Raise Rider Height Above Path to about half your capsule height (around 88 for the Unreal mannequin).
- Tune the speed. Adjust Max Speed, Min Speed and Slope Influence.
- Tune the launch. Adjust Launch Boost and Launch Pitch, and watch the Exit Arrow update.
- See what's possible. Open the Example Map and select any slide to see its settings.